多级主从
循环复制
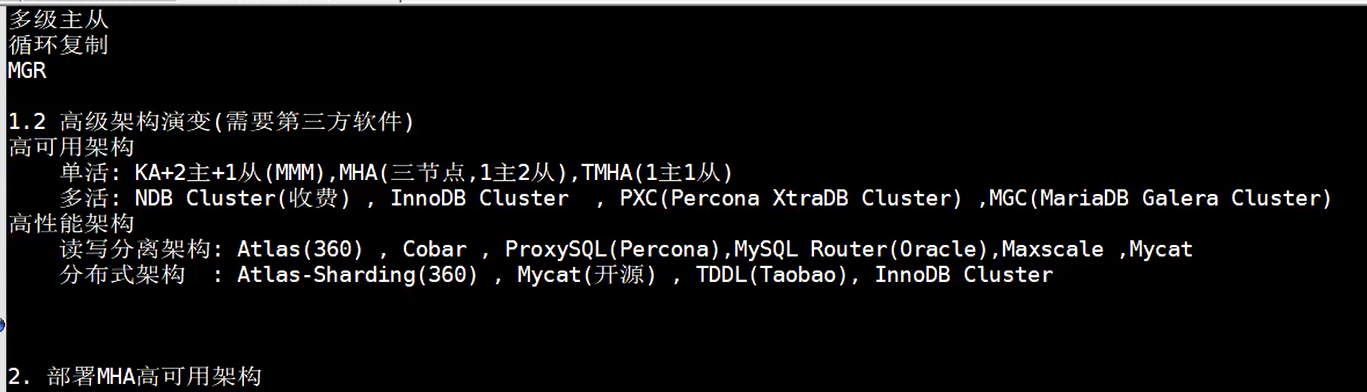
MGR
1.2 高级架构演变(需要第三方软件)
高可用架构
单活:KA+2主 +1从(MMM),MHA(三节点,1主2从) TMHA(一主一从)
多活:
yum install -y perl-Config-Tiny epel-release perl-Log-Dispatch perl-Parallel-ForkManager perl-Time-HiRes
https://blog.csdn.net/debimeng/article/details/80542521
https://github.com/yoshinorim/mha4mysql-manager/releases
https://github.com/yoshinorim/mha4mysql-node/releases
rpm -ivh mha4mysql-manager-0.56-0.el6.noarch.rpm
grant all privileges on *.* to mha@'10.0.0.%' identified by 'mha';
mysql 的安装
https://www.cnblogs.com/baoshu/p/centos-mysql.html
yum install libaio wget -y 安装依赖
yum list installed | grep mysql 检查MYSQL是否已安装
# 格式 yum -y remove [包名] 如果有先卸载
yum -y remove mysql-libs.x86_64
cd /tmp 下载MySQL官网的仓库文件
wget http://repo.mysql.com/mysql80-community-release-el7-1.noarch.rpm
yum localinstall mysql80-community-release-el7-1.noarch.rpm
yum repolist enabled | grep "mysql.*-community.*" 验证仓库是否添加成功
yum install mysql-community-server -y 安装MySQL
此时MySQL 安装完成,它包含了
mysql-community-server、mysql-community-client
mysql-community-common、mysql-community-libs 四个包
rpm -qi mysql-community-server.x86_64 0:8.0.16-2.el7 执行
whereis mysql 可以看到MySQL 的安装目录是 /usr/bin/
启动服务
systemctl start mysqld
systemctl enable mysqld
systemctl status mysqld
cat /var/log/mysqld.log | grep password 查找初始密码 (sc<TnQ,yP5mH Root123456)
mysql -uroot -p 进入mysql
mysql> ALTER USER 'root'@'localhost' IDENTIFIED BY '你的密码';
设置允许远程连接(新版MySQL的方式跟之前的不大一样)
mysql> use mysql;
mysql> select host,user,authentication_string,plugin from user;
mysql> update user set host='%' where user='root';
mysql> flush privileges;
mysql> status 查看字符编码